The Importance of a Thorough Roof Installation Inspection
Whether you’re building a new home or replacing an existing roof, a reputable roofing contractor will walk you through all the options that make sense for your goals, architecture and budget. A thorough inspection will help them understand what you need from your roof to safeguard your home.
Before the first shingle is placed, a professional will repair and strengthen your decking. They will also measure the length and width of each plane to determine how many shingles you will need. Contact Five Star Roofing and Contracting for professional help.
Sheathing, which consists of boards or sheet material affixed to the rafters that cover your roof, provides the base layer for shingles and other roofing materials. It also helps to protect against deterioration and offers support for the weight of the shingles or roofing materials. The sheathing can be made from wood or plywood, and it’s important to choose a high-quality product for long-term performance.
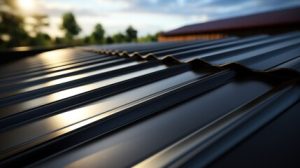
Choosing the right roofing materials is another critical step in the roofing process. Asphalt shingles are an affordable, classic choice for homes with sloped roofs, and they can be easily installed by a skilled roofing contractor. You can find a variety of shingle styles, colors and textures to match the look of your home. You can also opt for energy-efficient shingles that help reduce your electricity bills.
For flat roofs, you can install a single-ply membrane of waterproof rubber or thermoplastic compounds. Roofers roll these sheets over the insulation and seal the seams with either adhesive mechanical fasteners or stone ballast. Stone ballast helps resist uplift caused by wind and also shields the sheathing from UV deterioration.
In some cases, the underlying sheathing may need to be reinforced with metal flashing or other specialty materials to accommodate your chosen roofing material. Metal roofing systems, for example, require special flashing to prevent water backups and ice dams.
The type of sheathing you choose depends on your roofing material, roof pitch and other factors. Historically, plank sheathing was the standard and consisted of elongated wooden boards nailed to the rafters or trusses. However, modern construction relies on sheet sheathing like plywood or OSB. This is a faster and more cost-effective option that also delivers greater consistency in strength compared to traditional plank sheathing.
Some types of roofing materials, like slatted slate, require special installation techniques and aren’t suitable for every roof. However, these long-lasting materials can provide a striking appearance to your roof and enhance its durability. With regular maintenance, a slate roof can last for up to 50 years.
Preparation
Before the first shingle is placed, there are several important preparatory steps that must be completed to ensure the success of your project. The old adage that “a job well begun is half done” holds true for roofing, and careful preparation is key to ensuring that your project runs smoothly and the finished product meets your fastidious standards.
Start by securing the necessary permits. This can help to prevent project delays, and ensures that your roof is installed according to local laws.
Next, clear the work zone and prepare the equipment. Depending on the scope of your project, this may include moving cars, clearing the driveway or tarping fragile items stored in the attic. You should also ensure that the work area is safe by taking safety precautions such as removing ladders from around trees, and using a hard hat for added protection against falling debris.
Once the workspace is cleared, a good roofer will begin to prepare the new roof with flashing and sheathing. These are essential elements of your roof that keep water and other elements out, and should be installed properly to maintain the integrity of your home’s structure. Flashing is typically a metal material that is installed around chimneys, windows, joints and other areas of your roof to prevent water leaks. Sheathing is the plywood panels that make up the base of your roof.
Once the sheathing and flashing are in place, your roofer will begin laying shingles. This is an exciting stage, but it’s important to pay attention to the details to ensure a high-quality finish. For example, shingle tabs should be staggered as they are laid, and each row should be overlapped by 6 inches to ensure that they line up evenly. The overlapping helps to protect the edges of your roof and prevents water leaks. Additional protection is provided by installing ridge vents, valley flashing and ice and water sheathing along the eaves of your roof.
Installation
The roof installation process involves a number of critical steps. The first step is tearing off the old roof materials (if necessary). Then, contractors inspect and repair the roof deck and install underlayment and flashing. Then, they apply the roofing material and seal it properly to ensure longevity. Finally, the ridge cap is installed, and the contractor verifies proper ventilation methods are in place.
It is important to choose a roofing contractor with the right credentials. Reputable contractors are licensed, insured, and certified to guarantee professionalism and expertise. They are also well-versed in local building codes and adhere to industry standards for installation techniques. This helps to prevent damage and ensure compliance with manufacturer warranties, which can save homeowners from expensive repair bills in the future.
Work with your roofing contractor to develop a detailed project timeline and create contingency plans for unexpected issues. Then, obtain all required permits to avoid project delays and legal complications.
During the installation process, a reputable roofing contractor will protect your property by removing and disposing of waste materials, such as shingle scraps and nails, and cleaning up the work area. They will also blow away any leftover debris and clean gutters and landscaping near the house. Upon completion, they will perform a final inspection to verify the quality of their work and ensure that all aspects of the installation have been met. They should provide you with documentation of the installation process, materials used, and warranty information. In addition, they should inspect the surrounding property to remove any missed nails or other hazards that could pose a safety hazard.
Final Inspection
The final inspection is the last step in a quality assurance process. It ensures that a product meets all of its quality requirements before it is finished and delivered to customers. This helps to minimize risk and improve customer satisfaction, as well as ensure compliance with industry standards. A thorough final inspection can also identify opportunities for improvement, which can lead to greater efficiency and stronger bottom lines.
Performing a final inspection is an important part of any construction project. It can help to catch any defects or problems that may not have been noticed during the earlier stages of a building project. In addition, a final inspection can verify that a building or product complies with all relevant legal and industry standards before it is delivered to customers.
A successful final inspection can also help to protect a company’s reputation and ensure that the building is fit for occupancy. For example, if a problem is discovered with the plumbing or electrical system, then it must be repaired before a certificate of occupancy (CO) can be issued by the local authorities. A final inspection can help to identify these issues so that they can be resolved before the building is occupied by tenants or homeowners.
The inspection process typically involves a visual examination of the finished product. This can include examining the dimensions of the product, checking for scratches or dents, and ensuring that it meets all of its specifications. In addition, a final inspection may also involve testing the product’s functionality to ensure that it is safe and works as intended.
During the final inspection, an approved agency must provide the registered design professional of record and/or owner with a detailed written report that documents all the findings. In addition, the approved agency must notify the commissioner of any uncorrected discrepancies or defective work.
It is essential to ensure that all the necessary steps are taken to prepare for a final inspection. Failure to do so can cause significant delays in the overall project completion timelines. In addition, it can result in expensive legal fees and fines. Taking chargeable steps to comply with the relevant codes and regulations can prevent this from happening, while also helping to increase the resale value of the building in the future.